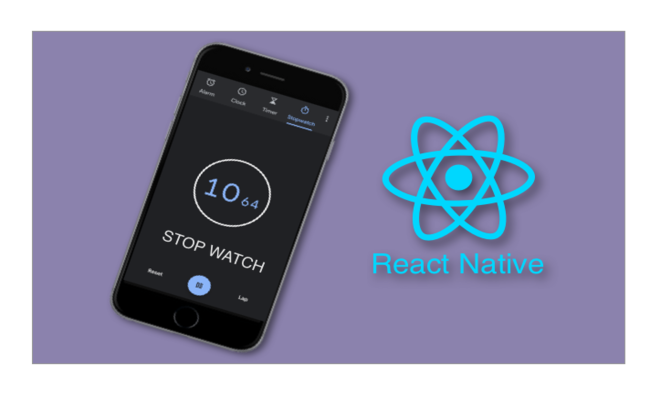
Stopwatch is quite a useful feature for mobile users. It is used to measure the time taken to complete a particular task. It accurately measures time intervals. React Native is a robust framework that can be used to build a Stopwatch. With its third-party support, the procedure becomes much easier. In this project, you will learn the use of the react-native-stopwatch-timer plugin used by the experts of React Native development company and build a functional stopwatch using React Native.
Without much delay, let’s get started.
What are the prerequisites?
Before getting into the actual tasks, that is to code, we have to perform other important tasks such as setup the environment, building a basic template, and getting the needed plugins.
- First, you have to set up the environment for the framework you have chosen. Here, we have to do the same, but for the React Native framework. If you already have set up the environment, you can move forward to the next step.
However, if you have not, dont worry. We have got you covered. So, first, choose the OS. Here, I want to work on Windows and Android. Also, we will go for the React Native CLI and not the Expo CLI. In this regard, we need to install Node, JDK, and React Native CLI. Apart from these, we have to download VS Code editor and Android Studio.
- You need an individual template for every project. So, for the current context, you have to pass npx react-native init ScreenShot_app –version 0.71.3. Note that, you have to run the command on a terminal. Also, open the terminal from a folder in which you want to save your project. If you have built HTML and CSS projects, you must have noticed that you need to create a folder dedicated to your project and then open the folder from the code editor. In React Native, you have to do the same; however, passing the given command on a specified terminal.
- We need a third-party library. Here, it is react-native-stopwatch-timer. With this library, you can easily integrate a timer or stopwatch functionality in your React Native app. It provides a customizable interface to stop, reset and start the time. To install the library, you need to run npm i react-native-stopwatch-timer on your app folder terminal. Although we are not focused on adding the timer functionality, you can add the same if you want. In that case, the installation process will be the same; however, you have to import both Timer and StopWatch in your codebase.
We will learn the detailed procedure later in the following section.
Building the Project and Accessing the Codebase

Image 1
The code imports the React library and the useState hook from the React library.
It also imports the SafeAreaView, StyleSheet, Text, View, and TouchableHighlight components from the React Native library.
Lastly, it imports the Stopwatch component from the React Native Stopwatch Timer library. This code sets up the necessary components and libraries to build a stopwatch application.

This code sets up a stopwatch component in a React app.
The code uses the useState hook to set up two state variables. The first one is stopwatchStart and another state variable includes resetStopwatch.
The initial value of stopwatchStart is set to ‘false’. This variable can be used to keep track of whether the stopwatch is active or not. Also, the initial value of the second state variable resetStopwatch is taken as ‘false’. This variable is used to reset the stopwatch to its initial state. It is possible when the user clicks on a “Reset” button.
The initial value of both the state variable is ‘false’ as the stopwatch is initially not running and neither has been reset. These values can be altered later in the component’s lifecycle through user interactions.
The next section defines the styling options for the stopwatch component. It has the background color, padding, border radius, width, and alignment of the items.
In the last section, the code defines the font size and color of the text that will be displayed in the stopwatch component.
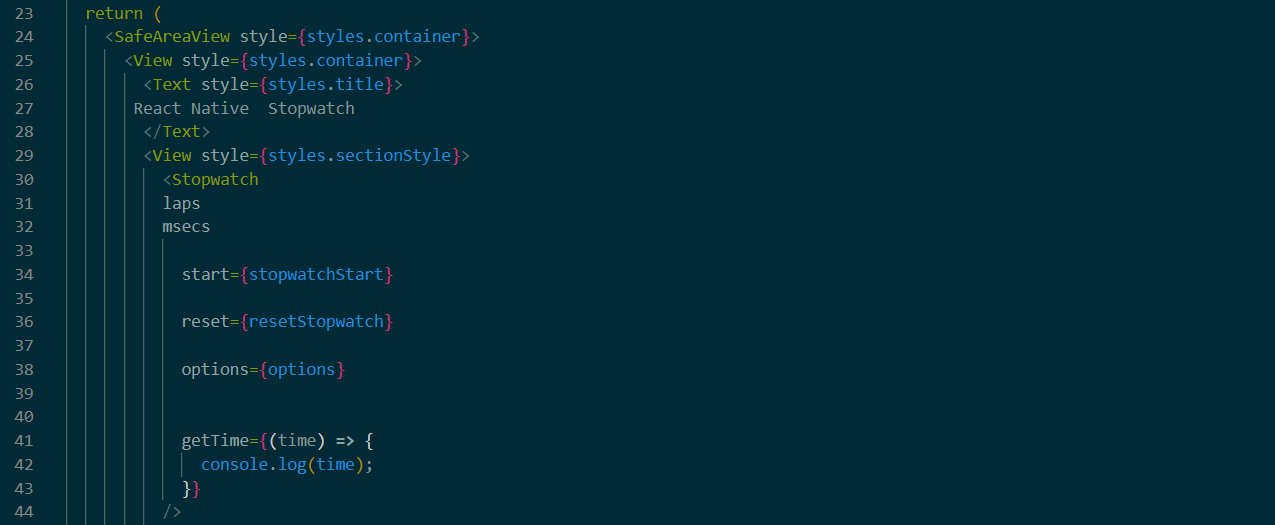
Image 3
The code snippet given in image 3 is an extended part of the project. It uses the SafeAreaView and View components to build the main container for the stopwatch.
The Text component is used to add a title for the stopwatch.
The Stopwatch component is used to build the actual stopwatch. Several parameters are added to it such as laps, msecs, start, reset, and options.
The ‘msecs’ and ‘laps’ are used to indicate whether the stopwatch will show lap times and/or milliseconds along with the seconds.
The ‘start’ prop has the value of the state variable (stopwatchStart). It controls the activity of the stopwatch as it detects if the stopwatch is running or not. When the value of the stopwatch start is set to ‘true’, it will start counting the time, whereas if the value is ‘false’, it will stop running.
The getTime function is used to log the actual time of the stopwatch to the console.

Image 4
This code sets up two buttons. The first one is to start and stop a stopwatch. The other one is to reset the stopwatch.
The first button will switch the state of the stopwatchStart variable between true and false. It also set the resetStopwatch variable to false.
The second button will set the stopwatchStart variable to false and the resetStopwatch variable to true.
For the button, the code uses the TouhableHighlight and onPress event handler functions.

Image 5
This code exports the main ‘App’ component and defines a style sheet for an application.
The “container” style has the flex property of 1. It implies that the component will cover the full width of the screen. It also sets the padding to 10 and the justifyContent and alignItems properties to center.
The “title” style sets the textAlign, fontSize, and fontWeight properties. It also sets the padding to 20. The “sectionStyle” style object sets the flex property to 1, the marginTop to 32, and the alignItems and justifyContent properties to center.
Lastly, the “buttonText” style sets the fontSize to 20 and the marginTop to 10.
To check the accuracy of the program
To do that, you need to run npm install and then npx react-native run-android on your project terminal. These are the two commands that will activate the program on the emulator.
Consider image 6 as the project’s output.

Image 6
As you can see, users can easily start, stop and reset the stopwatch.